|
Using Font Master
| 1. | Create a new page in the report. Select New Report Page from the Project window. |
| 2. | Go to the Project Tree and select the Page. |
| 3. | In the Property Panel, type in "FontMaster" in the Name property, while the Page is still selected. |

| 4. | Go to the Standard Toolbar. Find the FontMaster component and click on the button. Then click on the Page. |

| 5. | Look at the Project Tree Panel and notice that there is a new component underneath the Page called FontMaster1. But, when looking at the Page, there is no visual component. FontMaster is a non-visual component. |
| 6. | Make sure the FontMaster component is selected by clicking on it in the Project Tree. A green check mark will appear next to the component in the Project Tree to indicate that it is selected. |
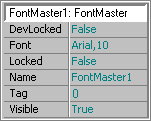
| 7. | While the FontMaster component is selected, look at the Property Panel. In the Font Property, click on the ellipse button (the button with three dots). |
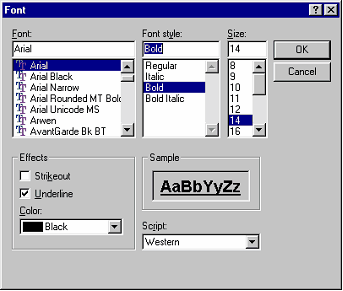
| 8. | The Font Dialog will appear after clicking the ellipse button. Use the scroll buttons and check mark boxes to make your desired selections. For this first FontMaster component, select Arial Font, Bold Font style, 14 size, and Underline in Effects. |

| 9. | Look at the Property Panel, with the component still selected. The Font Property will reflect the selection made in the Font Dialog. |

| 10. | Now with the Font Property still selected, scroll to the Name Property and put "FMArial14BldUndrln" in the Name property edit box. |

| 11. | Next look at the Project Tree and notice the name change. It becomes very useful and helpful to rename the components in the Project Tree in order to distinguish each component from each other. This is why we demonstrate renaming of the FontMaster component and the Page component. |
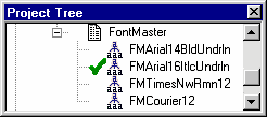
| 12. | Now, complete steps 4 to 11 three times using the following names and settings. FMArial16ItlcUndrln: Arial Font, size 16, Italic, an Underlined. FMTimesNwRmn12: Times New Roman Font, and size 12. FMCourier12: Courier Font, and size 12. To make understanding the renaming of many components, sometimes it is helpful to use a specific naming convention. In these examples we use the following naming convention for the FontMaster component names: |

| 13. | Next, drop down five Text components on the page, as well as one Memo component. |
| 14. | We will pretend to write a "letter" using components dropped on the Page. |
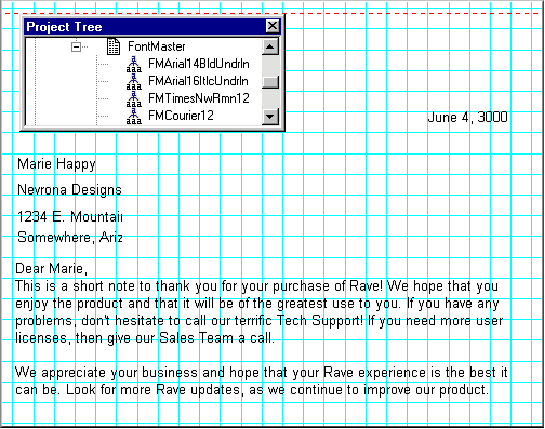
| 15. | Use one Text component to use for a date holder, and use the other four Text components to make an address label. The Memo component can be used for the body of the message. So, fill your components appropriately. For more information on how to fill the components with your own text, see the Property Descriptions Listing, or the section on Standard Components. Feel free to use the alignment tools to get the "letter" components to align correctly. Also, after some of the following steps it may be necessary to resize the text components to display all the text correctly. |
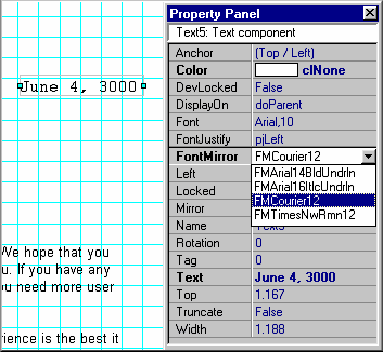
| 16. | Next select the Text component that has the date. While selected, change the FontMirror Property to FMCourier12 by using the drop down menu. Notice that the font of the Text component changed to the pre-set font settings of the FMCourier12. |
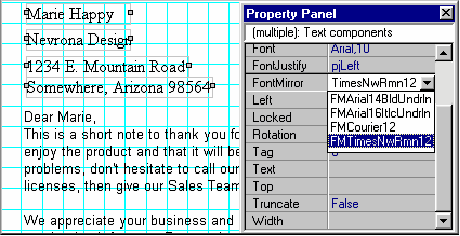
| 17. | Next select the four address Text components. The Property Panel will show the designation that this is a multiple selection of Text components. In the FontMirror property, choose FMTimesNwRmn12. |
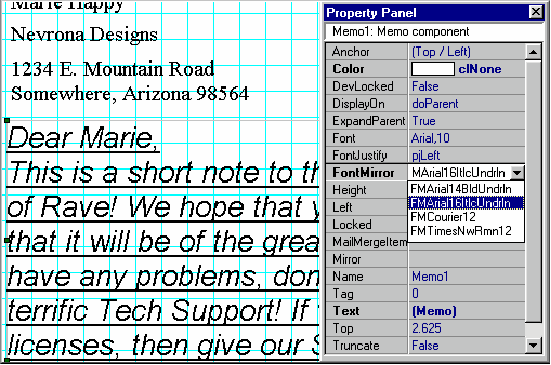
| 18. | Select the Memo component, which contains the body of the "letter". While it is selected, choose FMArial16ItlcUndrln in the FontMirror drop down menu. |
| 19. | This ends mirroring of fonts to components on the Page. One last thing to cover is what to do when you change your mind about the fonts? |
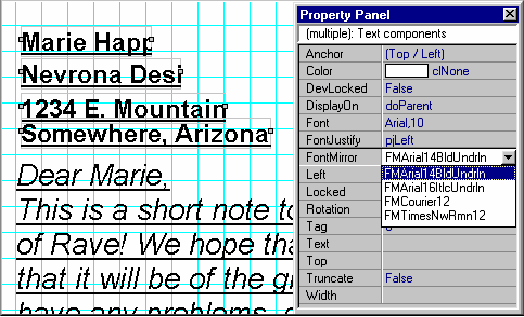
| 20. | Select all the address Text components. Change the FontMirror property to FMArial14BldUndrln. Now, this would be a way to change many Text/Memo components from one font setting to another, without changing each Font property in each component. |
| 21. | Sometimes there may be many components linked to one FontMirror component, because they all relate to one specific area of the report. In this example, we can assume that all address headers would be linked to the FMArial14Bldunderln Font Mirror property. So, to change this we would have to redo the one FontMirror property. |

| 22. | Select the FMArial14BldUnderln FontMirror component in the Project Tree. |
| 23. | In the Property Panel, while the component is still selected, click on the Font property ellipse button. |
| 24. | Change the Font Dialog properties to the following: Times New Roman, size 10 font, with no other Font Effects. |

| 25. | In the Name property of the FontMirror property, put the following name: FMTimesNwRmn10. |
|