A Free Slide Show on your PC!
Select the Images you want in a slide show, run a menu option and your slide show is ready.
- Choose the Menu option . The Slide Show dialog is displayed:
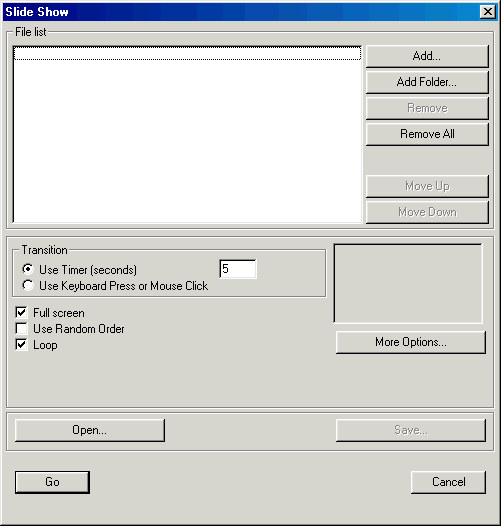
The dialog consists of two panels, above the File List, the list of images to be included in the slide show, and below the Options, which control the display options.
-
Press the Add...button to add files to the list. The dialog Choose files is displayed:
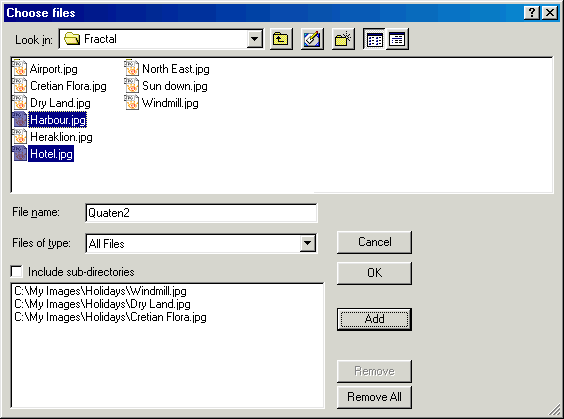
- In the Choose files dialog you can select one or more image files to be included in the slide show. Use the Ctrl key and Mouse button to select several files.
- Selected files are then added to the file list by pressing the Add button.
- Confirm your choice with the OK button. These image files are now shown in the file list. Repeat these steps until you have all the image files you want.
- The default display order in XnView is to show images in the same as the file list, from top to bottom. This can be changed as required by using the Move Up and Move Down buttons until you have the order you want.
- Using the options in the Slide Show dialog and the general options which can be displayed using the Options buttons, you can fine-tune the slide show and for example set duration, full-screen mode, and display or hide the name of the image files.
- Start the Slide show by pressing the Go button. The slide show is then displayed (The default option is Full Screen mode).
- If you have set the transition to "Use Keyboard Press our Mouse click", you can navigate using the mouse buttons or the keyboard. The right mouse button displays the next picture, the left mouse button displays then previous. The arrows keys can also be used to navigate through the slide show.
You can quit the slide show by pressing the
Esc key. The
Slide Show dialog is displayed, again. You can now add or remove images as required and then run the slide show as many times as you like. You exit the
Slide show dialog by pressing the
Cancel key.
You can save the slide show by pressing the
Save button and later load it again using the
Open button. The list of image files and the current slide show options are saved.
 Tips:
Tips:
You can select image file(s) in the Browser. Then choose the menu item or the symbol

.
The dialog
Slide Show is displayed with the selected files already included in the
File List.

 Slide Shows.... The Slide Show dialog is displayed: