|
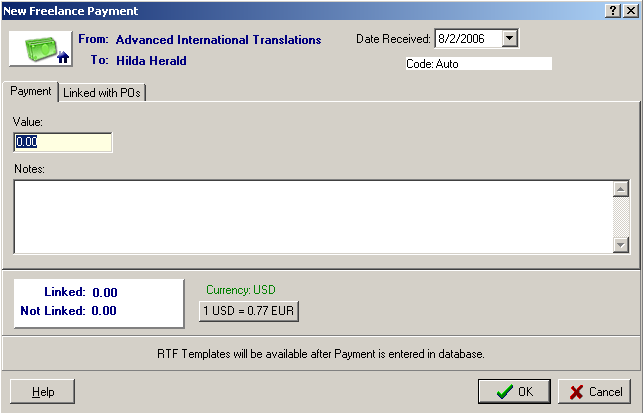
In the New Freelance Payment window you can enter the payment details and link it with a PO.
It opens on the New button click from the Payments page of the Freelancer window.
The general view of the New Freelance Payment window:

You can enter the payment sum in the Value field. Optionally you can additional notes in the Notes text field.
Using the Date Received drop-down calendar you can specify the date when the payment was received.
The Payment Code is generated automatically.
On the Linked with POs tab you can create a link between the payment (or a certain part of it) and a PO to the freelancer:

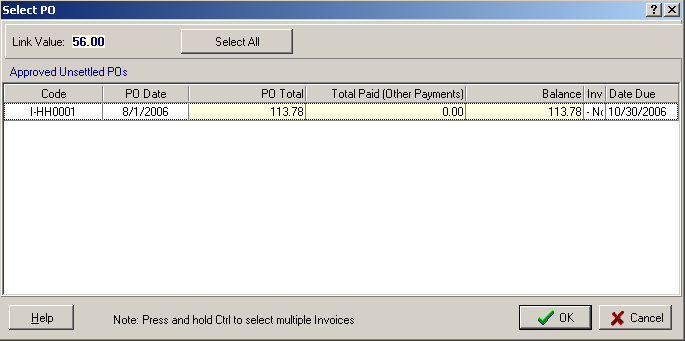
One payment can be linked with several POs. To create a new link click New Link. In the Select PO window select the necessary PO (you can click Select All button to select all POs displayed) and click OK.

On the Linked with POs page you can create a Phantom PO to cover the negligent pars of the payment to make it Fully Linked.
You can create/delete a Phantom PO using Add Phantom PO/Delete Phantom PO button (the button is dimmed if the Payment is linked with the PO and the PO sum exceeds the Payment sum).
Phantom PO is created on the total not-linked part of the payments sum.
 Note: When the Payment is linked to any PO its Value and Date Received fields are locked. Note: When the Payment is linked to any PO its Value and Date Received fields are locked.
After you click OK in the New Freelance Payment window the new Freelance Payments is added to the database.
You can change its details, edit links with POs and save the Payment using .rtf templates in the Edit Freelance Payment window. To open click the Edit having selected the necessary record or double-click the record.

See Also:
Payments to Freelancers managing
|