You are reading help file online using chmlib.com
|
You are reading help file online using chmlib.com
|

|
|
Top Previous Next |
|
Projetex 2006 Import Utility was created as a “wizard” to make data importing quick and simple. To import data from the file of supported format please switch to offline Projetex 2006 database (see Database Status for details) and launch Projetex 2006 Import Utility.
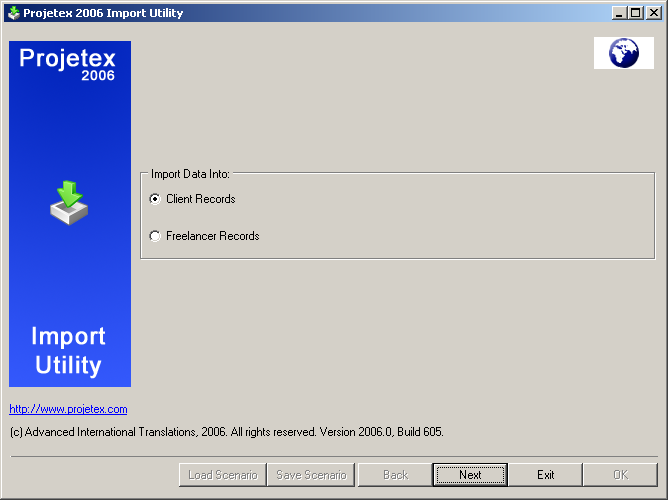
Step 1. Select the type of information you want to export: client information or freelancer information. Click Next to proceed.
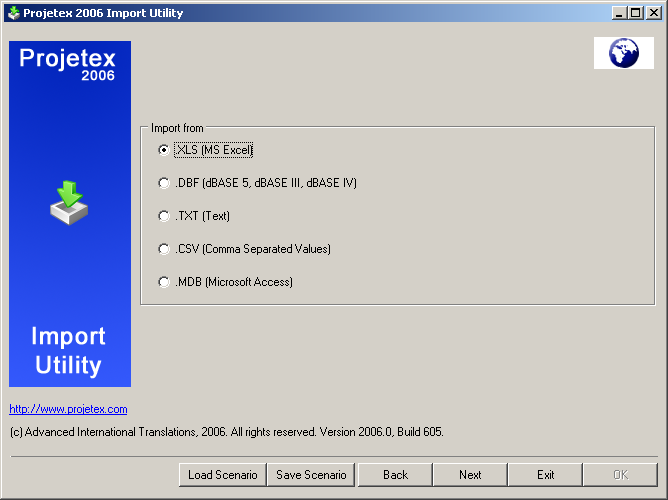
Step 2. Select the format of the data file you are going to export from:
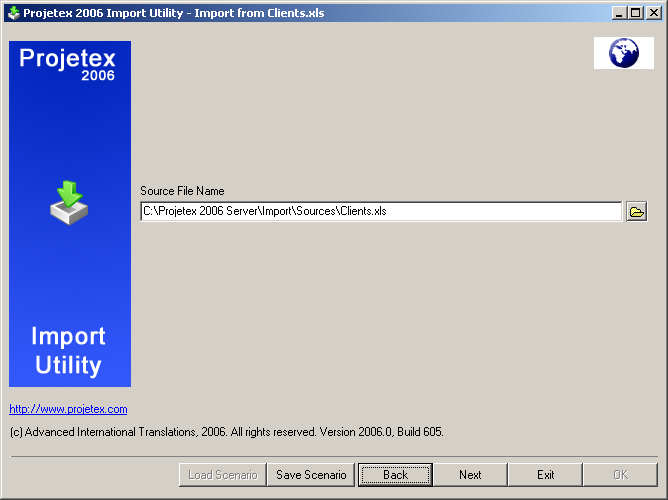
Click Next to proceed. Step 3. Specify the file you are going to export from:
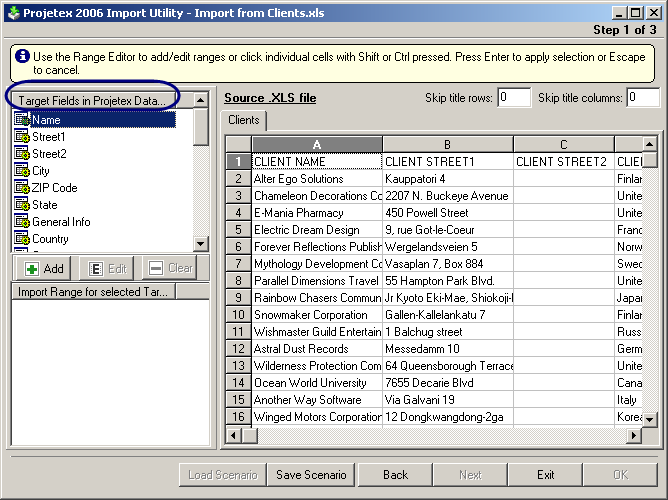
Click Next to proceed. Step 4. To proceed to the main part of import procedure you need to prepare the source file. Please study carefully the list of available fields Target Fields in Projetex Database.
If possible split up the data according to the fields available. For example, if you have address stored in one field, it is better to split it into several columns: country, address1, address2. If there are no appropriate fields for some piece of information, you can add the necessary fields manually: shut down the utility first and then add all necessary fields to the corresponding table (clients or freelancers). For details see System Administrator Basic working procedure > Corporate Settings. To get back to importing please repeat Steps 1-4. The newly created custom fields should appear in the end of the Target Fields in Projetex Database list. If the fields did not appear please check if they were created correctly using Projetex 2006 Server Administrator and make sure that you selected the correct option on Step 1. We would like to draw your attention to Price Group, Price Service, Price Unit and Price Value fields of the Target Fields in Projetex Database. These fields were added to enable importing clients/freelancers prices. You need to fill Price Group, Price Service, Price Unit and Price Value fields to import clients/freelancers prices successfully; please note that Price Value cannot have negative value. Only one column should correspond to Price Service field, e.g. if its value is a language pair, like “English => French”, the string should be a single whole, not “English” in one column and “French” in another column. Price Group field is not mandatory, as its value is set "Translation" automatically, if other is not specified. Clients can have more then one price (more then one service in other words): Supposing you need to import information about a client, which has two prices: English => French price and English => Japanese price. To complete exporting successfully, you need to duplicate the information about this client twice (according to the number or prices (services)):
To avoid creating two "Alter Ego Solutions" client records in Projetex 2006 database, you need to set the utility Import Mode to Import New and specify the list of fields, by which it can be determined that current client has been already exported and only price data should be exported now. For details on setting Import Mode value and specifying the list of fields see Step 6. After custom fields were added and the source file was prepared to importing, you need to create links between data meant for importing and corresponding Projetex 2006 fields. For details see:
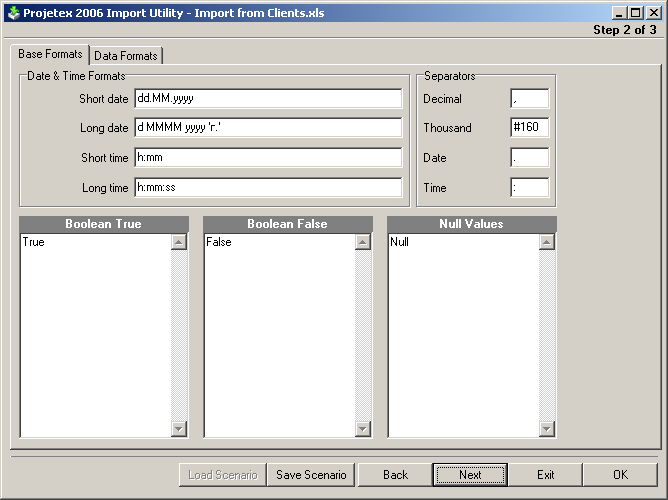
After creating all necessary links, click Next. Step 5. Regional settings (Base Formats, Data Formats) Base Formats
Decimal separator - set a character, which delimits the decimal parts of the imported numbers. Thousand separator - set a character, which separates the digit groups in the imported numbers. Date separator - set a character, which separates the groups in the imported dates. Time separator - set a character, which separates the groups in the imported times. Short date, Long date, Short time, Long time - use these edit fields to set the date and time formats. Boolean True - set some variants of TRUE value representation in the imported table, e.g. 'Yes' or '+'. Use new line for each new variant. Boolean False - set some variants of FALSE value representation in the imported table, e.g. 'No' or '-'. Use new line for each new variant. Null Values - set some variants of null value representation in the imported table, e.g. '0' or 'Empty'. Use new line for each new variant.
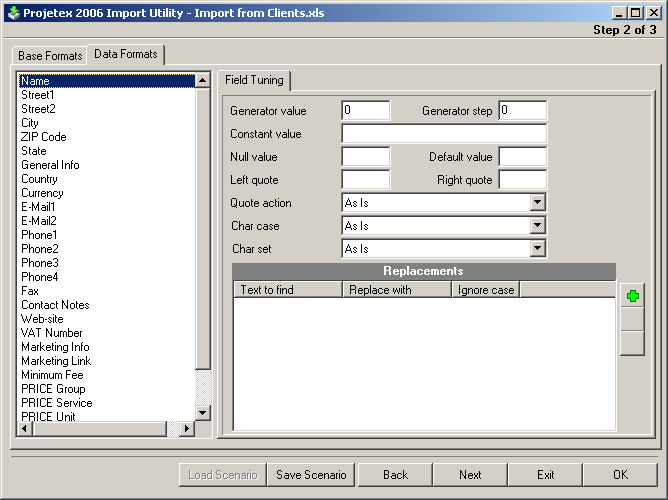
Data Formats On Data Formats tab you can customize the format of each imported field in case when additional formatting is required. Select the field in the field list on the left and set its format in the proper edit fields.
Generator value - use this edit field to set the initial value of the autoincrement field. Generator step - set the step of the autoincrement field. If it is 0 then the value of the generator will be ignored. Constant value - use this edit field to set the constant value of the field. Null value - set the value, which will be understood as NULL to set the default value. Default value - set the default value of the NULL field. Left quote - set a character or a number of characters, which denote quoting in the imported string. Right quote - set a character or a number of characters, which denote quoting in the imported string. Quote action - you can select Add to add quotation marks to the imported string, Remove to remove all the quotation marks from the imported string or As Is to save the original quotation marks. Char case - set the case of the imported string. As Is saves the original string, 'Upper' sets the whole string to upper case, 'Lower' sets the whole string to lower case, 'UpperFirst' sets the first letter of the string to upper case, 'UpperFirstWord' sets the first letter of each word to upper case. Char set - set the char set of the imported string to ANSI or OEM. 'As is' saves the original string char set.
Use Replacements part of the dialog box to set the replacement list for the selected field. Fill the list in the following format: <Value-to-find>=<Replace-with-Value>. E.g., you set the following replacements for the field 'Continent': 'South America'='S. America' 'North America'='N. America', that means, that all the values 'South America' of the field 'Continent' will be replaced with values 'S. America', and values 'North America' will be replaced with 'N. America' respectively. Click Next to proceed.
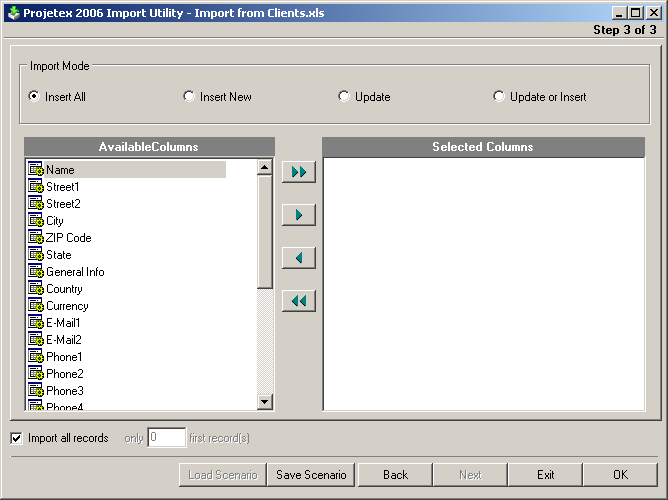
The Import Mode property allows you to define actions executed while importing data. The following values are available:
All options except Insert All, require specifying the key fields, by which it can be determined if Projetex 2006 database contains this record already (select the fields from the list on the left and add them to Selected Columns using buttons with arrows). Usually client name and country are selected. Import all records option- check this option to import all records from the source table. Import only ... first record(s) - if you do not want all the records to be imported, set a number of records to import them from the source file. In this case only this number of records (beginning from the first one) will be imported.
To start importing data click OK. |
You are reading help file online using chmlib.com
|