|
 Note: Right after installation your Projetex 2006 database may contain some sample Clients, Projects and Jobs. Since it would be more convenient for you to start with empty database, please ask system administrator to install empty database on Projetex 2006 Server. Note: Right after installation your Projetex 2006 database may contain some sample Clients, Projects and Jobs. Since it would be more convenient for you to start with empty database, please ask system administrator to install empty database on Projetex 2006 Server.
If you have no Projects in your database, the Project list is empty.

Adding a new project
To add a new Project, click New Project button:
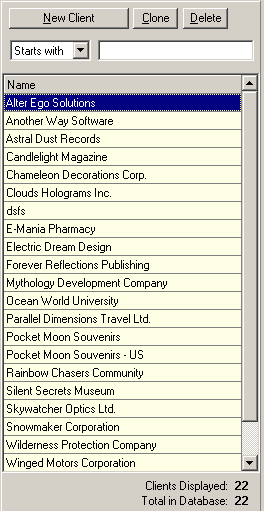
First you have to select the Client for this Project.
To select a Client from the list, double-click the Client name.
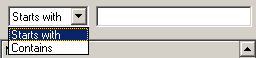
If the Client list is very long and the name of the current client is not displayed, you may enter the first letters of the Client name into Starts with: field. Or you can select Contains from the drop-down list above the Clients list and enter the letters the required Client Name contains:
If the Client is new, you may add the client by clicking New Client button.
See: Client page > Main
You may also delete the selected Client by clicking Delete button.
|
|
Note: You can also create Projects using Projects page of Client window.
When you have chosen the Client, New Project window appears:
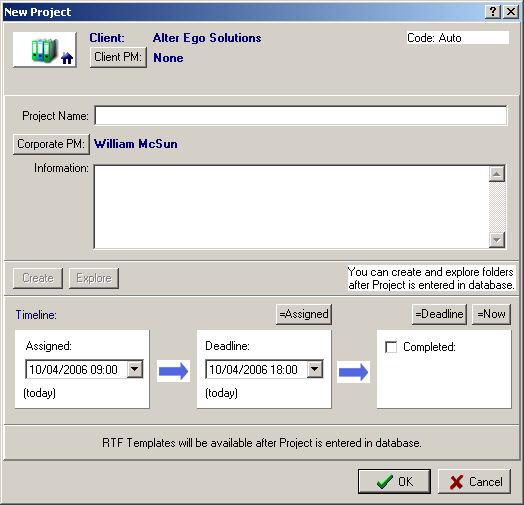
Enter Project Name and Information about the project into corresponding fields.
Specify the deadline of the project clicking drop-down button in Deadline: section:
|
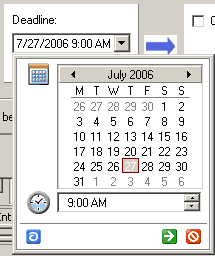
In the drop-down dialog box you can easily select deadline month, day, and time:
| · | To select deadline month, click the right and left arrows near the month name. |
| · | To select deadline date, click the day number. |
| · | To select deadline time, click the up and down arrows near the time field. You can also enter the time manually.
|
|
To finish creating the Project, click OK.
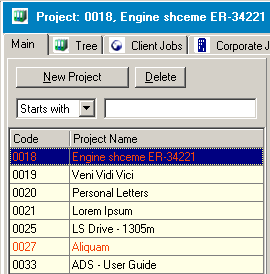
When you finished creating the Project, it appears in the Project list in the Main page:
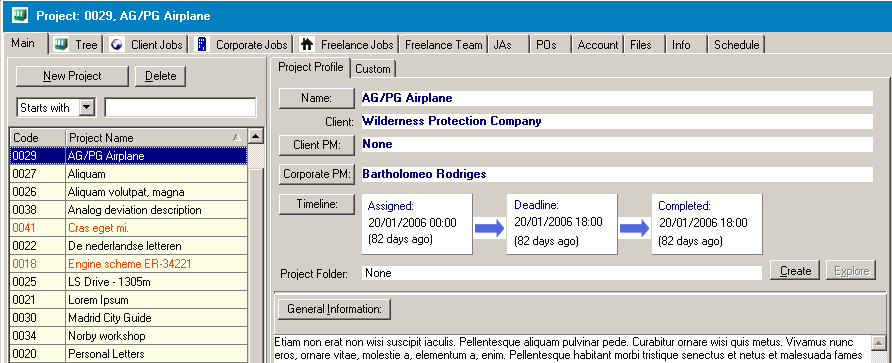
Projetex 2006 automatically assigns the unique code for the Project. On the Main page you can easily:
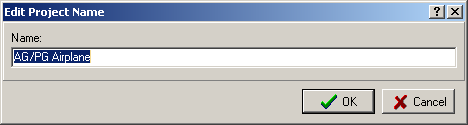
| · | Change Project name: click Name: button and make the necessary corrections in the Edit Project Name window: |
| · | Change the client project manager: click Client PM: button and select the necessary record from the clients contacts list in the Select Client PM dialog: |
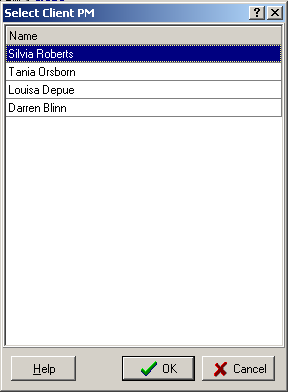
Note: You can add/edit/delete records in this list on the Client window > Contacts page.
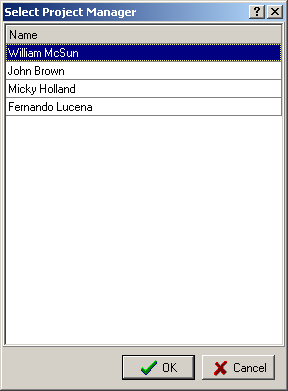
| · | Change the corporate manager responsible for the project: click Corporate PM: button and select the necessary record from the project managers list in the Select Project Manager dialog: |
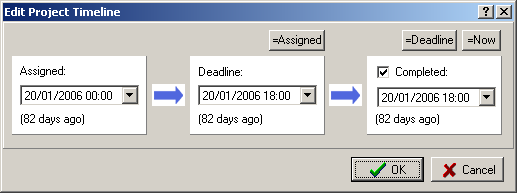
| · | Change the project assignment date, deadline and completion date (if completed): click Timeline button and make the necessary changes in the Edit Project Timeline window: |
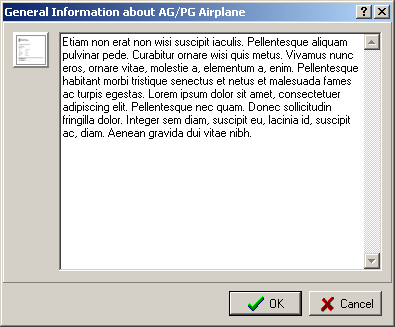
| · | Change the general information about the project: click General Information button and edit the notes in the General Information about... dialog: |
Clients usually send you one or more files related to the project. Thus, you need to create special folder for the Project to store this files. To create the Project folder click Create button near Project Folder: field:

When the Project Folder has been created, you can open it by clicking Explore button:

After clicking Explore button the project folder opens in Windows Explorer:
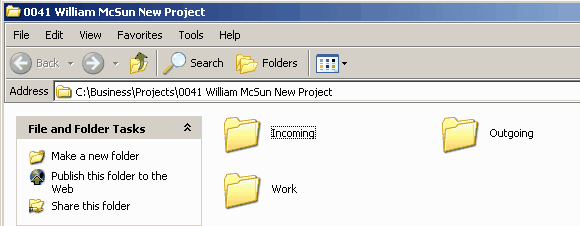
As you can see, the created project folder contains three subfolders:
| · | Incoming – for the files received from the client; |
| · | Work – for the files created during the work on project; |
| · | Outgoing – for the files to be sent to the client. |
Note: Projects' folders can contain custom subfolders which will be automatically created together with the parent folder. These subfolders can be specified on the Folders page of the Corporate Settings window of Projetex Server Administrator.
To delete the existing Project select it from the list and click Delete button.
Note: The Project cannot be deleted if it already contains Jobs, JAs or POs.
Records in Project list are marked by color:
|
•Black – the Project is completed.
•Green– the Project is not completed, deadline in the future.
•Blue – the Project is not completed and due today.
•Red – the Project is not completed and overdue.
|
Note: You can change colors to mark off items status on the Colors: Status page of the Current User Settings.
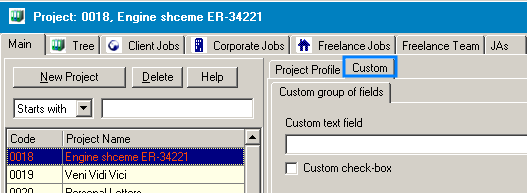
You can create custom fields of different data types for storing additional information about Projects. Custom fields appear on the Custom tab of the Main page of the Project window:
Custom fields can be added on the Custom Fields page of the Projetex Server Administrator Corporate Settings.
See Also:
Creating Client Jobs
Creating Expert Jobs
Folder Structure Administration in Projetex 2006
| 